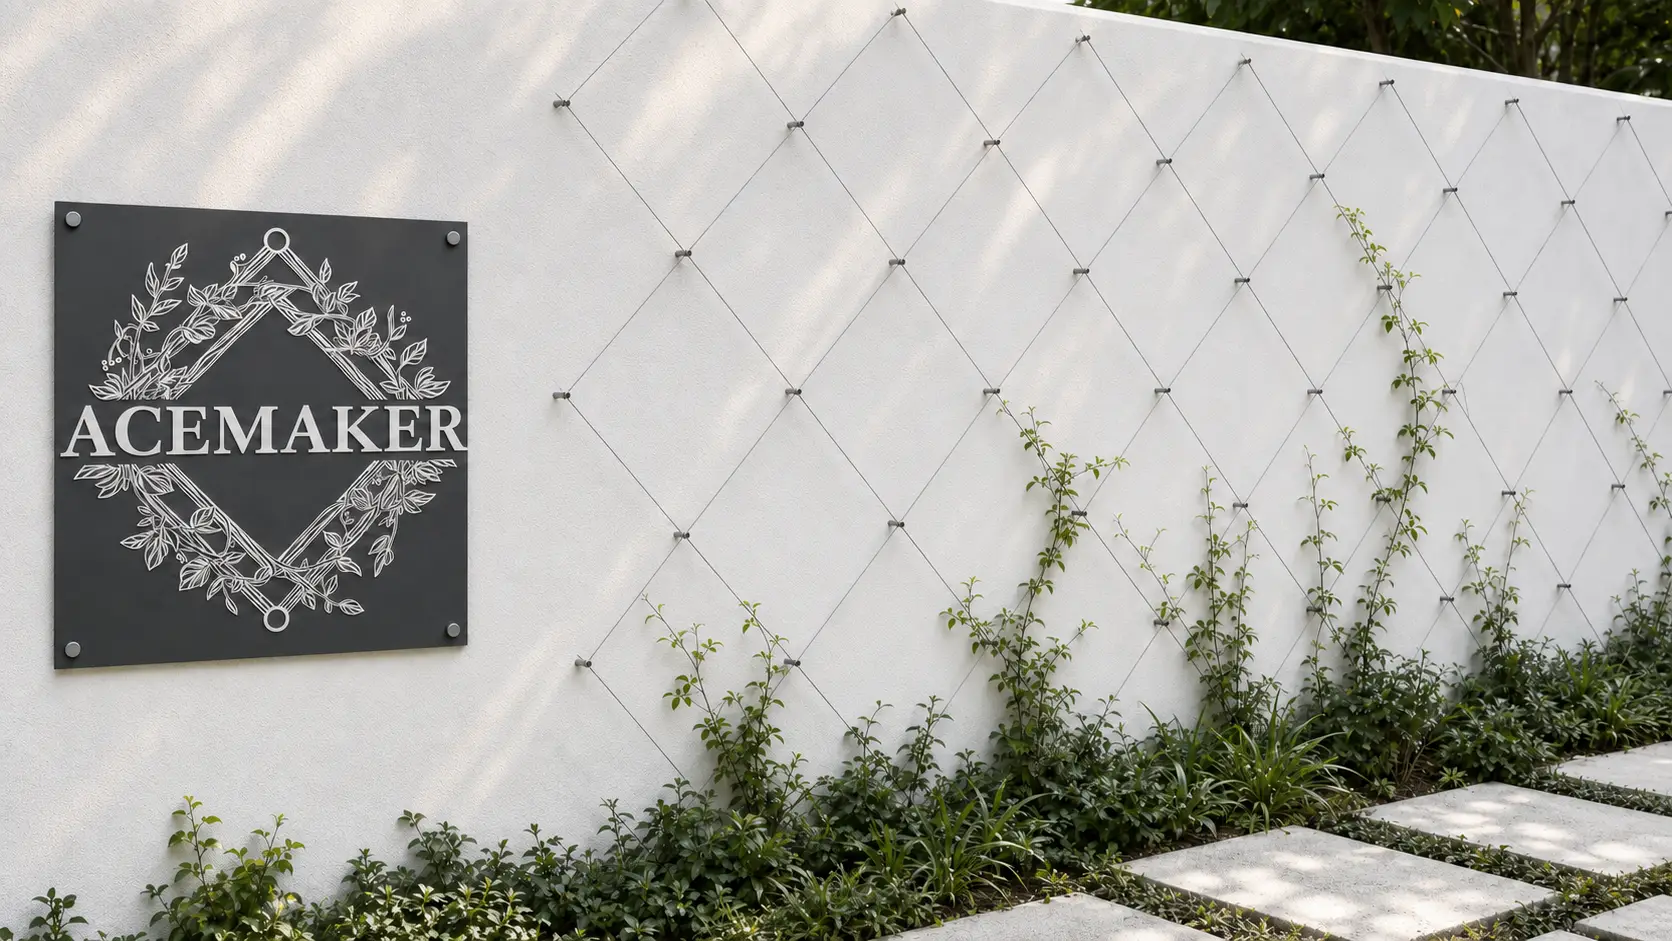
A wire trellis can turn an empty wall, fence, or patio boundary into a growing vertical garden without covering the architecture with a bulky lattice. The finished result looks simple, but a durable installation depends on decisions made before the first hole is drilled: the wall substrate, the mature plant, cable spacing, mounting hardware, and a practical way to tension and inspect the system.
This guide walks through those decisions in order. It is written for homeowners and DIY installers planning a wall-mounted cable trellis for climbing plants. Use it alongside the instructions supplied with your selected Product. If the wall, plant, or installation is unusually large or exposed to strong wind, ask a qualified contractor or landscape professional to review the anchoring and load path before you begin.

What Is a Wire Trellis System?
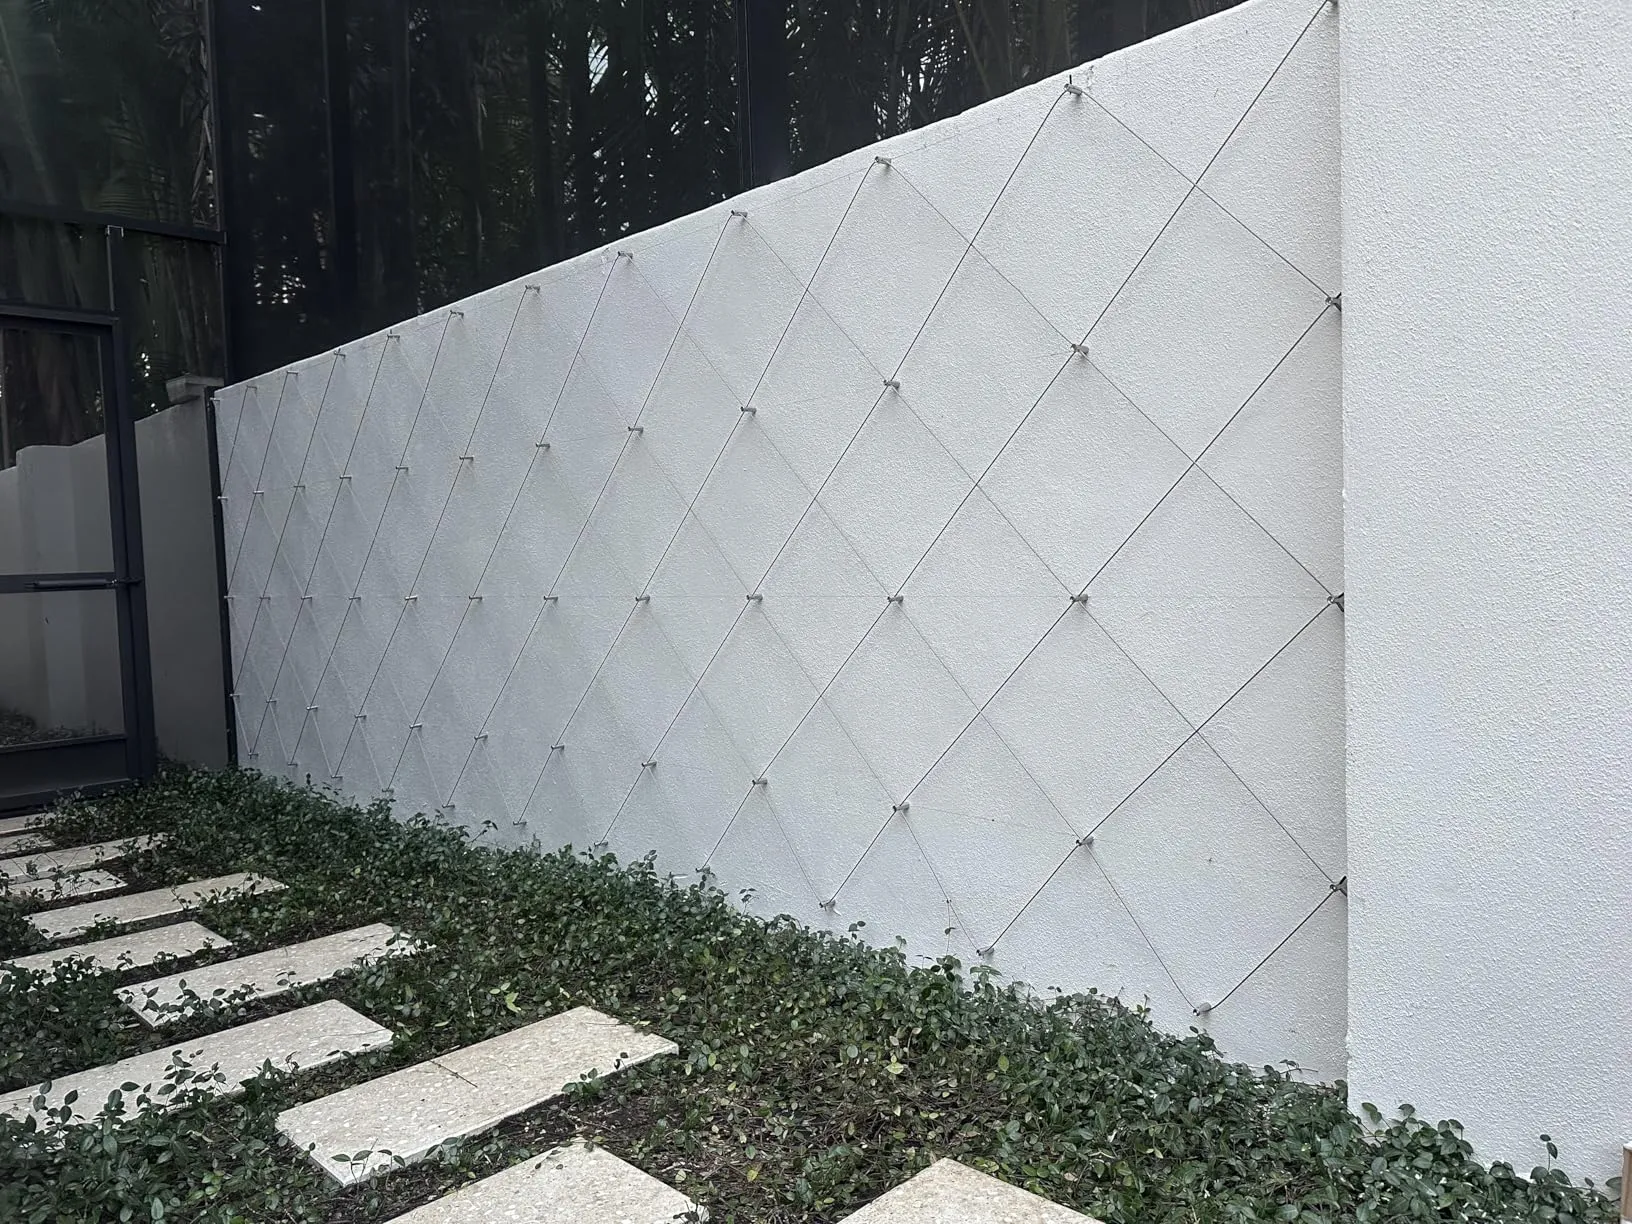
A wire trellis system is a network of tensioned cable held away from a wall or fence by mounting hardware. Anchors transfer force into the structure, stand-offs create clearance for the plant, and the cable provides lines that stems can be tied to or trained along. The system may be arranged as horizontal and vertical runs, a diamond pattern, a fan, or a custom design.
The cable is only one part of the system. The wall, fasteners, stand-offs, end points, and the way the plant is attached all affect the result. A thin cable anchored incorrectly is not safer than a thicker cable, and a strong Product cannot compensate for a weak or unsuitable wall. Treat the installation as a small structural assembly rather than as decoration that happens to use wire.
Compared with a wooden lattice, a cable trellis has a lighter visual footprint and can be laid out to follow the proportions of a particular wall. It is also easier to adapt around doors, windows, corners, and planting beds. A lattice may be the better choice when a plant needs a broad continuous surface or when the wall cannot accept the required anchors. The right system is the one that fits the plant, substrate, and maintenance plan.
Materials and Tools You Will Need
Start with the installation instructions for the exact Product you plan to use. Acemaker offers Crosshead Kits, Cylindrical Kits, Cross Cable Clamps, and other trellis hardware in different configurations. The finish, cable size, included anchor, and termination method can vary, so do not combine parts simply because they look similar.
Selected Acemaker configurations are described as T316 stainless steel, while some Products also use a black finish, a cable coating, or ABS mounting hardware. Treat those as separate specifications: finish and coating affect appearance and surface protection, but they do not replace checking cable compatibility, anchor capacity, or the installation instructions.
| Component | What it does | What to check |
|---|---|---|
| Cable | Creates the visible support lines and carries plant ties. | Diameter, coating, length, compatible fittings, and the maximum span recommended by the instructions. |
| Anchors and stand-offs | Connect the cable to the wall and hold it clear of the surface. | Wall substrate, anchor type, drill size, embedment, clearance, and water-sealing requirements. |
| Cross Cable Clamp | Joins perpendicular cable runs at a floating intersection. | Match the clamp to the cable diameter and tighten it without crushing or damaging the cable. |
| Tensioning hardware | Removes slack and makes later adjustment possible. | Whether your selected Product uses a tensioner, manual termination, or another method. |
Wire trellis component planning table
Cable
- What it does
- Creates the visible support lines and carries plant ties.
- What to check
- Diameter, coating, length, compatible fittings, and the maximum span recommended by the instructions.
Anchors and stand-offs
- What it does
- Connect the cable to the wall and hold it clear of the surface.
- What to check
- Wall substrate, anchor type, drill size, embedment, clearance, and water-sealing requirements.
Cross Cable Clamp
- What it does
- Joins perpendicular cable runs at a floating intersection.
- What to check
- Match the clamp to the cable diameter and tighten it without crushing or damaging the cable.
Tensioning hardware
- What it does
- Removes slack and makes later adjustment possible.
- What to check
- Whether your selected Product uses a tensioner, manual termination, or another method.
Acemaker systems use 5/64-inch and 1/8-inch cable configurations. In round numbers, those are approximately 2 mm and 3.2 mm. The visual difference is modest, but the choice should follow the Product instructions, plant weight, cable span, anchor layout, and the look you want. A smaller cable may recede more quietly into a wall; a larger cable may provide a more substantial visual and mechanical system. Cable diameter by itself is not a load rating.
5/64 in: approximately 2 mm, with a lighter visual presence.
1/8 in: approximately 3.2 mm, with a more substantial visual presence.
For a quick comparison of current configurations, visit the Acemaker product catalog. Compare the mounting style, cable diameter, finish, cable length, and included hardware—not just the number of pieces in the box.
Gather the rest of your tools before marking the wall:
- A tape measure, pencil or marker, and a long level.
- A drill and the correct bit for the structural substrate behind the finish.
- A compatible cable cutter, hex key, and small hand tools specified by the instructions.
- Eye protection, gloves, and a stable ladder or platform when working above shoulder height.
- Exterior-rated sealant when the wall system or local building practice requires sealing penetrations.
Planning Your Trellis Layout
A good layout begins with the usable planting area, not the size of the kit. Measure the width and height of the wall or fence section, then subtract doors, windows, downspouts, vents, light fixtures, corners, and any area that must remain accessible. Mark the edges of the planting bed too: the cable should give the plant a route from its base to the upper growth area rather than ending where the plant cannot reach it.
1. Choose the pattern
A rectangular grid is easy to measure and works well when you want horizontal and vertical training lines. A diamond pattern creates diagonal routes and a more architectural rhythm. Both patterns can work; the choice should follow the plant's growth habit and the proportions of the wall. Sketch the pattern on paper before transferring it to the surface.
Rectangular grid: keeps horizontal and vertical runs easy to measure.
Diamond pattern: creates diagonal routes and a different visual rhythm.
2. Measure the structure, not only the finish
Look for the framing or masonry that will actually receive the anchor. Brick faces, mortar joints, stucco, rendered surfaces, and fence boards behave differently. The selected anchor needs enough sound material behind it, and the stand-off must not be asked to bridge a loose finish. If you cannot confirm the load-bearing material, pause and get advice before laying out dozens of holes.
3. Select spacing conservatively
Spacing controls three things at once: the visual density of the pattern, the distance a growing stem must travel before it can be tied, and the span each cable segment must hold. Acemaker's current planning guidance keeps heavy-plant hub spacing within 60 inches, while the calculator accepts a practical planning range for common layouts. That is guidance, not a universal structural rating. Dense, heavy, wind-exposed, or unusually tall plantings may require closer support and a professional review.
For a simple rectangular estimate, you can think in terms of the usable width divided by the horizontal spacing and the usable height divided by the vertical spacing. The calculator turns those measurements into an estimated hub count, cable length, and sketch. Try the free trellis calculator before purchasing so you can compare a compact layout with a more open one.
4. Plan for plant weight and movement
A young plant may put almost no load on the system, while the same plant can become heavy after several growing seasons. Add the weight of stems, leaves, fruit, wet foliage, and wind movement to your mental model. Leave room to prune and tie the plant without trapping it against the wall. A system that is slightly more open and easy to inspect is often better than a dense pattern that disappears under growth.
5. Make a takeoff before ordering
Write down the number of end points, intermediate hubs, intersections, cable runs, and terminations in your drawing. Then compare that list with the contents of the Product you are considering. A kit can include enough cable for one pattern but not another, and a Cross Cable Clamp may reduce the number of wall anchors without reducing the total cable needed. Leave a sensible allowance for routing and termination, but do not assume that a large surplus solves a compatibility problem.
Keep the drawing with your order notes and label the cable runs by location. This simple record helps when a layout changes after planting, when you need to replace one section, or when you want to repeat the pattern on another wall. It also gives a support team useful information if you need help: wall dimensions, substrate, pattern, cable size, and a photo of the proposed installation are more useful than a product name alone.
Step-by-Step Wire Trellis Installation
Once the layout is approved, install slowly. A few extra minutes with a level and a dry layout can prevent a row of misplaced holes. The sequence below is intentionally general: the exact anchor, cable termination, and tensioning method must come from your Product's instructions.
Before installation day, place the cable, fittings, drill bits, and protective equipment in one work area. Confirm that the weather is suitable for drilling and sealing, that the ladder can stand on a stable surface, and that someone can help when a long cable run needs to be held in position. Dry-fit a small portion of the pattern on the ground if the layout is unfamiliar. A calm start makes it easier to notice a wrong component before it is fixed to the wall.
1. Mark: transfer the measured layout.
2. Mount: install compatible anchors and stand-offs.
3. Thread: route cable before making final cuts.
4. Tension: remove slack gradually.
5. Connect: secure compatible intersections.
6. Finish: trim, inspect, and guide the plant.
Step 1: Mark and drill the anchor points
Transfer the approved drawing to the wall with light marks. Establish one reference line with a level, then measure from that line instead of measuring every point independently. Check the first row and column before marking the rest. This catches a wrong starting point before it becomes a pattern-wide error.
Drill only after confirming the substrate and the bit specified by the instructions. A concrete or masonry anchor is not interchangeable with a wood screw, and a screw driven into siding or a thin finish may not reach a structural member. Keep holes square to the surface, clear dust as directed, and seal penetrations when required by the wall assembly. If the drill meets unexpected resistance or a void, stop and reassess rather than forcing the anchor.
Step 2: Install the mounting hardware
Install anchors and stand-offs in the approved sequence. Crosshead Kits and Cylindrical Kits use different mounting shapes and may create different wall clearances, so follow the diagram supplied with the selected configuration. The stand-off should sit firmly against the intended surface without crushing a fragile finish or rocking under light hand pressure.
Do not fully tighten every component before checking alignment. Snug the first few points, place a level or straightedge across them, and correct the pattern while adjustments are still easy. Once the rows, diagonals, and end points are aligned, finish tightening to the instruction's specification. Over-tightening can damage a finish or distort a fitting.
Step 3: Thread the cable
Lay out the cable path before cutting. Start with the longest or most important run and leave the termination tail recommended by the instructions. Route the cable through each fitting in order, keeping it clear of sharp edges and avoiding unnecessary bends. For a diamond pattern, check that each diagonal reaches the intended corner or turning point before moving to the next line.
Keep the cable gently supported while you work. A loose temporary loop is easier to correct than a cable cut too short. Do not assume that a cable from one diameter can use a clamp or end fitting made for another diameter; a mismatched connection may slip or damage the strands.
Step 4: Tension the cable gradually
Tensioning removes visible slack; it should not turn the cable into a rigid structural rod. Work from the end points toward the middle, making small adjustments and checking adjacent runs after each change. If your Product uses a tensioner, adjust it according to its instructions. If it uses manual tensioning, secure the termination carefully and recheck it after the first few minutes.
Stop when the cable is firm, aligned, and stable under a light hand check. Do not continue tightening until the wall fitting moves, the finish cracks, or the cable makes a high, tight-string sound. A plant needs some room for natural movement, and seasonal temperature changes can alter tension. Recheck the system after the first period of growth and after severe weather.
Step 5: Add cross intersections
A Cross Cable Clamp can connect perpendicular runs at an intersection without adding another wall anchor when the clamp and cable are compatible. Place the clamp where the pattern requires it, make sure both cables are seated, and tighten the set screws evenly. The goal is a secure connection that holds the crossing together without flattening or cutting into the cable.
If a clamp is difficult to close, do not compensate by using excessive force. Check the cable size, the orientation of the clamp, and whether the cable is fully seated. A clamp is a connector, not a substitute for a missing anchor at a point that is supposed to carry force into the wall.
Step 6: Trim, finish, and guide the plant
Trim cable tails only after the pattern has been checked from several angles. Cover or secure sharp ends according to the Product instructions, collect offcuts, and make sure no exposed strand can catch clothing or injure someone working near the wall. Photograph the completed layout before the plant covers the fittings; it makes future maintenance easier.
Tie young stems loosely with soft plant ties and guide them toward the nearest cable. Do not force a stem around a sharp corner or bind it tightly enough to restrict growth. A wire trellis is a framework for training, not a reason to attach every new shoot at one point.
Choosing Plants for a Wire Trellis
Choose the plant and the support together. Climbers differ in how they grip, twine, spread, and gain weight. Some need regular tying; some use tendrils; others become woody and heavy over time. The best cable pattern is the one that gives the mature plant enough routes while leaving space for pruning and inspection.
| Plant type | Planning focus | Installation note |
|---|---|---|
| Light annual vines and vegetables | Frequent tie points and a route that follows the plant as it grows. | Keep the planting base accessible and avoid letting fruit or foliage pull on one small section. |
| Roses, jasmine, clematis, and similar climbers | Mature spread, pruning access, sun exposure, and enough clearance from the wall. | Use soft ties and distribute stems across several cable runs instead of concentrating weight at one hub. |
| Grapevines and espalier forms | Long-term branch structure, seasonal pruning, and a pattern that matches the desired training form. | Plan the permanent framework before the plant becomes woody; review anchor capacity for mature growth. |
| Vigorous woody climbers such as wisteria | Significant mature weight, growth force, and wind exposure. | Do not rely on a generic guide alone; obtain a site-specific structural or landscape review. |
Plant planning considerations for wire trellises
Light annual vines and vegetables
- Planning focus
- Frequent tie points and a route that follows the plant as it grows.
- Installation note
- Keep the planting base accessible and avoid letting fruit or foliage pull on one small section.
Roses, jasmine, clematis, and similar climbers
- Planning focus
- Mature spread, pruning access, sun exposure, and enough clearance from the wall.
- Installation note
- Use soft ties and distribute stems across several cable runs instead of concentrating weight at one hub.
Grapevines and espalier forms
- Planning focus
- Long-term branch structure, seasonal pruning, and a pattern that matches the desired training form.
- Installation note
- Plan the permanent framework before the plant becomes woody; review anchor capacity for mature growth.
Vigorous woody climbers such as wisteria
- Planning focus
- Significant mature weight, growth force, and wind exposure.
- Installation note
- Do not rely on a generic guide alone; obtain a site-specific structural or landscape review.
Plant selection is also local. Check mature size, hardiness, sun, irrigation, pruning, and whether a plant is self-clinging or needs ties. A plant that is suitable for a warm patio may struggle on a cold or shaded wall. The cable size should support the chosen installation plan, but it does not make an unsuitable plant suitable.

Maintenance and Longevity
Stainless steel is a strong choice for outdoor hardware because it resists corrosion better than ordinary carbon steel, but “stainless” does not mean maintenance-free or immune to every environment. Salt air, pool chemicals, fertilizer, trapped moisture, dissimilar metals, and surface contamination can all change how hardware ages. Inspect coastal and high-exposure installations more often than sheltered ones.
Add a quick check to your seasonal garden routine. Look for loose anchors, cracked or damaged finishes, cable fraying, unexpected slack, sharp cable tails, plant stems trapped behind hardware, and growth that is concentrating load in one area. After a major storm, check the wall and end points before retensioning anything. If an anchor has moved or the wall surface has cracked, unload the system and get advice before making it tighter.
- Retie or redirect new growth before it becomes woody and difficult to move.
- Prune to maintain airflow and keep plant weight distributed across the pattern.
- Clean visible hardware with a method suitable for the finish; avoid harsh abrasives.
- Record the original layout and any replacements so future maintenance stays consistent.
Common Wire Trellis Mistakes to Avoid
- Anchoring into the finish instead of the structure. Stucco, siding, tile, and a thin fence panel may not carry the same load as the framing or masonry behind them. Confirm the substrate and choose the anchor accordingly.
- Choosing spacing before considering the mature plant. A pattern that looks tidy around a young vine may become inaccessible or overloaded after several seasons. Plan for the plant you expect, not only the plant you have today.
- Over-tensioning to hide a layout problem. Cable tension cannot correct a crooked mark, a weak anchor, or a span that is too long. Relax the system, correct the cause, and retension gradually.
- Cutting cable before the path is proven. Thread the full route, check the pattern, and leave the specified tail before making a final cut. Extra cable is cheaper than rebuilding a short run.
- Mixing incompatible cable and fittings. Cross Cable Clamps and end hardware are made for specific sizes and configurations. Confirm compatibility before installing a connector.
- Ignoring access and maintenance. Do not place a hub where it blocks a window, service panel, door, drain, or future pruning route. A beautiful system that cannot be inspected will become difficult to maintain.
Wire Trellis FAQ
What is the best wire size for a wall trellis?
Choose the wire size from the plant, span, anchor layout, and product instructions rather than wire size alone. Acemaker offers 5/64-inch and 1/8-inch systems; heavier plants and longer runs need a more careful review of the wall and anchoring system.
Can I install a wire trellis on brick, concrete, stucco, or wood?
A wire trellis can be installed on different substrates, but each substrate needs the correct drill bit, anchor, and installation method. Identify the structural material behind the finish and follow the instructions for the selected Product before drilling.
How tight should wire trellis cable be?
Cable should be firm and visually straight without being pulled as tight as a guitar string. Tension gradually, check the anchors and wall surface, and leave room for seasonal movement and plant growth. Never use tension to compensate for an unsuitable anchor.
How far apart should trellis hubs be?
Spacing depends on the plant, pattern, cable size, wall, and desired visual density. For heavy plants, Acemaker currently recommends keeping hub spacing within 60 inches; use the calculator and product instructions for a project-specific estimate.
Do I need a calculator before installing a wire trellis?
You do not need a calculator for a very small layout, but it helps estimate spacing, hub count, and cable length before drilling. Acemaker's free calculator supports diamond and rectangular layouts in imperial and metric units.
Plan Once, Install with Confidence
A successful wire trellis starts with a clear load path: a suitable wall, compatible anchors, a pattern that fits the space, and a plant that can be trained and maintained. The most reliable installation is not necessarily the densest or tightest one. It is the one you can inspect, adjust, prune, and enjoy as the garden changes.
Measure your usable area and try the free trellis calculator to estimate a layout before drilling. When you are ready to compare a Crosshead Kit, Cylindrical Kit, or compatible accessory, browse the Acemaker product categories. You can also view more finished installations in the gallery or contact the Acemaker team for help with a specific wall and pattern.